[This post is part of The Accidental Photo Adventure]
The next morning our plan was to follow the sun. The North-East end of the park would get the earliest light, while the South end would get the last light of the day.
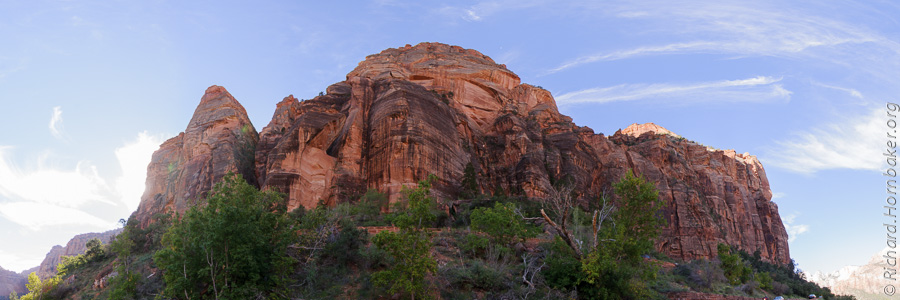
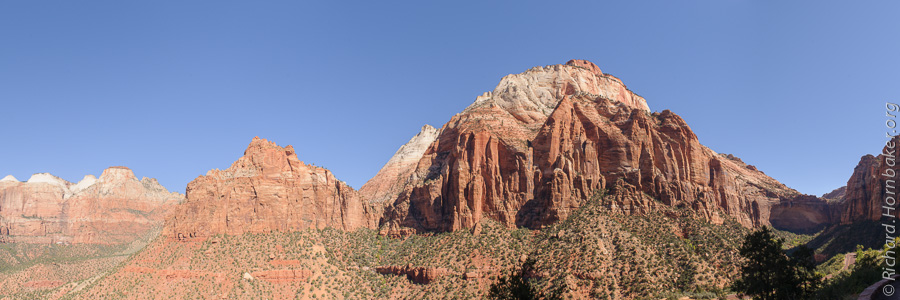
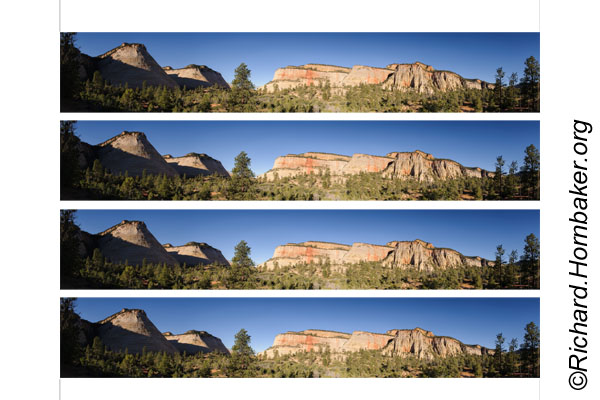
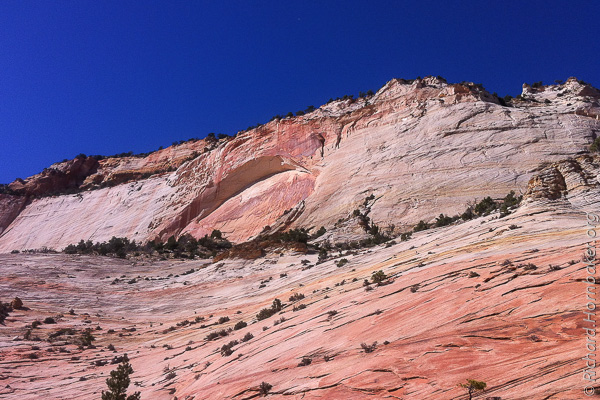
Our first stop was about 45 minutes before dawn, near a hill called Checkerboard Mesa. This hill and an adjacent cliff would be the first point of interest to be lit by the sunrise. There was an observation area with parking, but as typical you couldn’t see the whole panorama from one point without trees obscuring the view. Solution: get to higher ground.

Across from the observation area was a small hill that had been carved out for the road. That gained about 30 feet of elevation so we were now looking over the tops of the trees. In the uncropped version of the panorama (see below), you can see how the elevation made a difference compared to the parking lot below.
It was a brisk 27 degrees as we started our setup, with a breeze and no sun. I’d remembered a heavy coat and hat, but managed to leave my gloves in the hotel; the sun couldn’t come up fast enough!
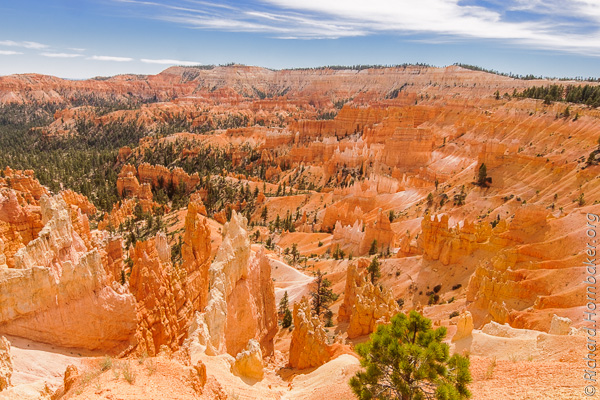
For the image above, I shot with a 24-70mm at about 30mm. I used the same 6″x7″ GND filters I’d bought for the wide-angle lens, adding an adapter to attach it to the 77mm filter ring on this lens. However, what I didn’t think through is the fact that on a longer lens a much smaller section of the filter would be used, making the soft edge of the GND much softer. Plus the design of Lee’s adapter is a little odd – it’s well made, but designed to pop off the lens a little too easily.
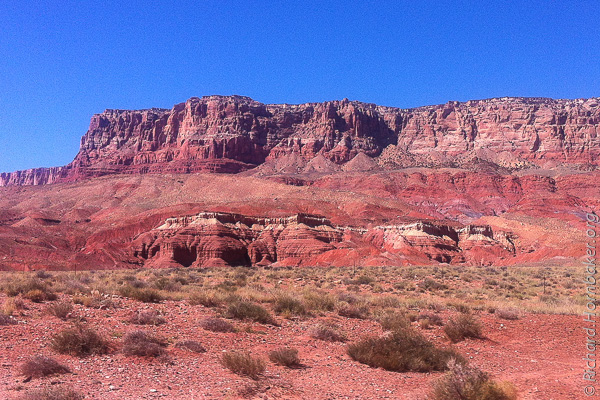
This is a a shot of the Checkerboard Mesa from later in the day, and you can better see the unusual cross-hatch texture that gives it its name. Truth be told, I probably should have shot the panorama image above a little later to expose this detail, but in my mind’s eye it wasn’t the main subject of the panorama so I didn’t give it as much consideration as I should have.

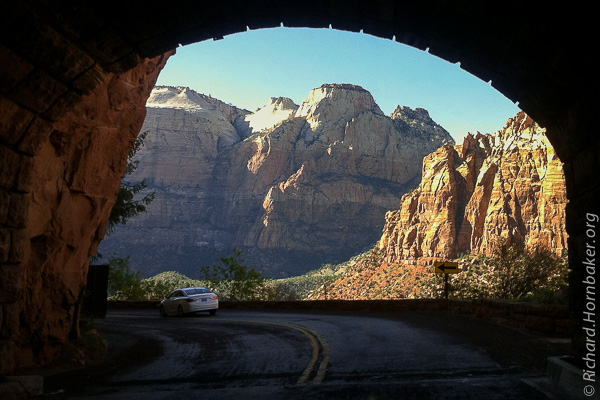
Further into the park was a small tunnel that I was able to shoot during a short break in the traffic.
 And some really interesting patterns in the stone. I shot this one thinking it might make an interesting abstract, or desktop wallpaper. A little later in the day would have yielded a bit more definition via shadows.

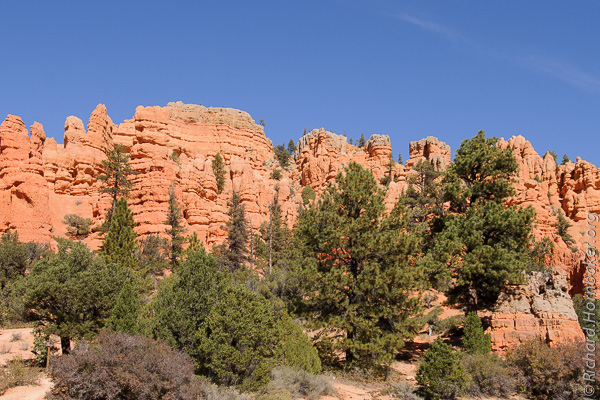
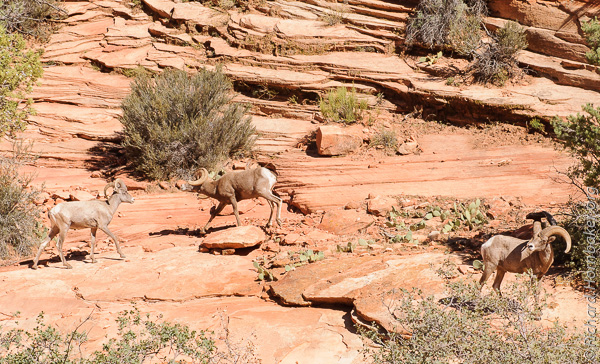
Further in, we came across some wildlife grazing.

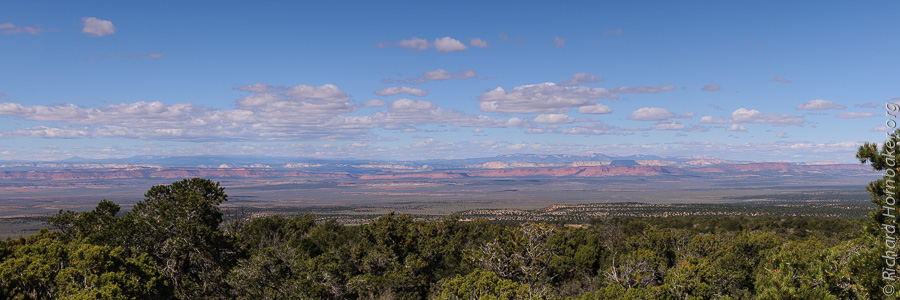
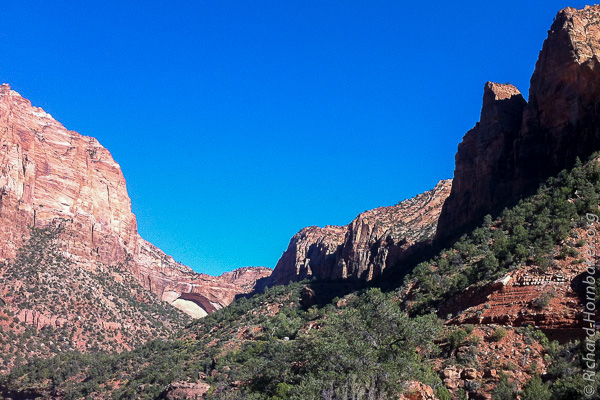
In the center of the park, just outside the long tunnel is a wide panorama (the tunnel is behind me here).

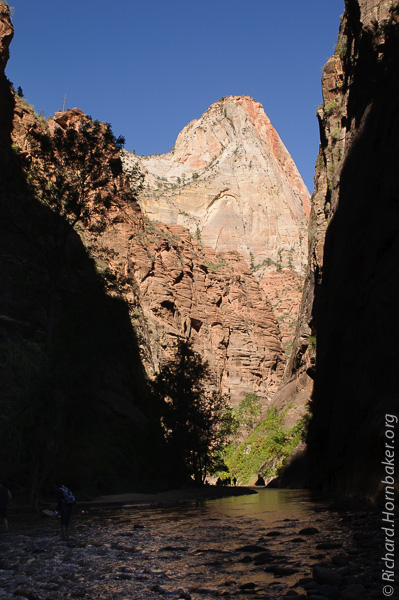
Next, we hiked to an area known as the Narrows, an upper section of the Virgin River where the cliffs are vertical and, well, narrow. This Northern area of the main park is only accessible by shuttle, which runs about every 5 minutes. The hike from the shuttle stop is about a mile along a paved path.
These photos were part of an experiment. (That’s my story, and I’m sticking to it.) The photo on the left was taken without filters. The one on the right was a test with two filters. One filter was a 0.6 (2-stop) hard-edge GND diagonally lined up with the shadow line on the left, to make the right side of the image darker, allowing the overall exposure to be increased to expose the shadows on the left.
The other filter was a Hitech-Formatt 10-stop neutral-density filter. It did what it should by extending the exposure time 1000x, turning a 1/30-second image into a 30-second image, which blurs the flowing water. However, the filter also adds a strong color cast that’s proven difficult to correct. It also has a real issue with even the smallest of reflections in the lens. That filter’s going to take a bit more work to be useful.
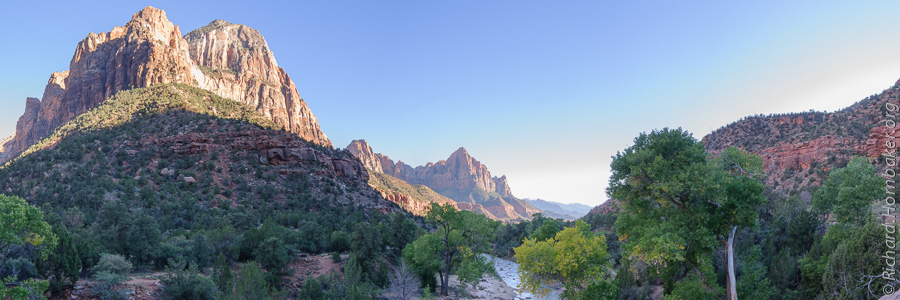
At the end of the day, we camped out early to capture the sunset. Our vantage point was a bridge at the South end of the park, with an exciting wrinkle – the bridge was plenty wide, but had no sidewalk. We had to stay close to the edge and watch our backs; buses came pretty close more than a couple times.

I intended a few things for this pano that didn’t quite come off – first, I shot it for HDR, but I didn’t like the results (so what you see here is from 6 single exposures). Second, I was hoping for more of an orange glow – this didn’t happen until the last 10 minutes of sunset, when the shadows had swallowed everything except the far peak. And third, I’d composed for a taller shot to capture more of the stream in the foreground, but had to crop it out because there was too much clutter on the sides (e.g., capturing the edge of the bridge, people standing, parked cars, etc.); this was due to shooting from the bridge.
Some Thoughts on on Shooting Panoramas
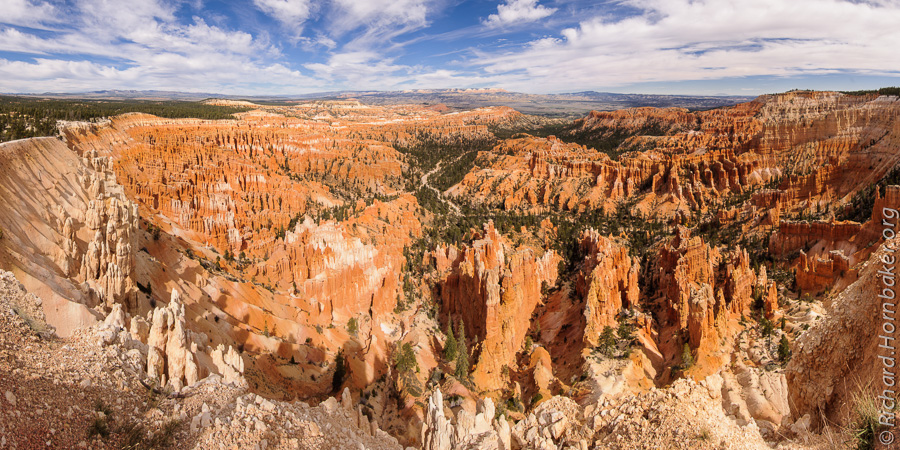
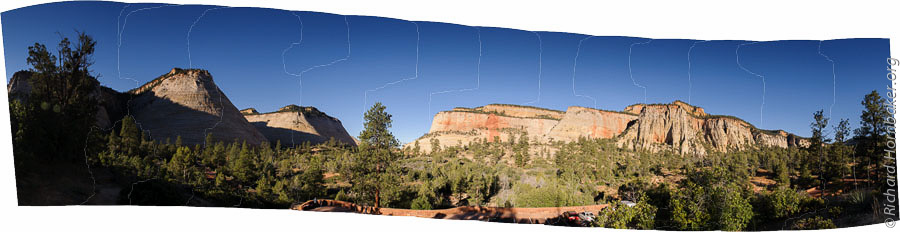
For a bit of technical discussion, here’s the uncropped version of the image above, which gives a better idea of how the shots were taken. This panorama is comprised of 14 images, and then cropped to a 6:1 ratio (which is 4x wider than a typical photo). That’s a pretty skinny panorama; usually I strive for a 3:1 ratio.
 Something that’s not obvious is that these images were all shot in portrait orientation – i.e., camera vertical. This takes a lot more shots to compose the final image, but it leaves you with many more pixels for a large print. This final image is 20,000 pixels wide, which means it could be printed 7 feet wide at 240 pixels per inch – you could put your nose on the print and still not see pixels. However, it does make for big files – this one’s over 300MB.
On a technical note, you can see that my tripod wasn’t very level, judging by the curved edges of the stitched image – that’s a good way to cripple your cropping options on a panorama; I got lucky this time because the subject was particularly wide. The hairlines you see in the image show where Photoshop selected from different frames to stitch the image together. (Normally I use a product called PTgui to stitch my panoramas, but I’m giving Photoshop CS5.5 a try for this trip.)
A few comments on my technique for panoramas… Focus is set on the main subject using spot-focus, then switched to manual. Exposure is always Manual mode; the aperture is fixed at f/11 or f/16 for most of the shots on this trip for deeper depth of field, and shutter speed is adjusted to control the exposure. ISO is set to the native value for my camera (ISO200). I also have the camera set for 14-bit capture (instead of 12-bit), which yields a little more dynamic range.
No HDR bracketing was done for this image – just one shot per frame. Exposure was set so the brightest point in the frame (the cliff face) was just barely warning about blown highlights in my camera’s LCD preview – this yields the most detail form the shadows without losing the highlight detail.
When I shoot for panoramas, I overlap each shot by 50%, which gives the software the most material to correct lens distortion; I also always shoot an extra frame on each end for the same reason. I don’t use a panorama head on my camera, so objects in the foreground do get distorted, and when composing an image I need to plan for that cropping. (If you search on the keywords “entrance pupil”, you’ll find explanations for this.)
And Some Thoughts on Printing Panoramas
The challenge with printing panoramas is that many shops don’t offer the shape you need, or they charge a premium. My solution is to layout multiples of the same panorama in a single file, then trim them to size myself. Your local FedEx Office (Kinko’s) has roller cutters in their public area that can trim up to 48″ sheets.
 Here are the steps I use in Photoshop:
- Open the image
- Image | Image Size | 24 inches @ 300 pixels/inch – for a final image that’s 24″ wide
- Add copyright text
- Right-click on the Background layer and select Layer from Background – this keeps the layer from resizing when the canvas is resized
- Layer | Merge Layers – to combine the text and photo
- Image | Canvas Size – set this to the actual dimensions of the print paper
- Duplicate the image layer, and drag the copy downward while holding the shift key to keep them aligned
- Add 2-pixel hash marks with the pencil tool, to make the end cuts easy to align
- Image | Mode | 8 bits/channel – to support the JPEG file format.
- Edit | Convert to Profile | sRGB – all printers will work with sRGB; if I have a printer-specific ICC profile, I’d select it here instead.
- File | Save as in JPEG at the highest quality setting
The reason this photo doesn’t go edge-to-edge on the print above… the large-format printer I use has a 1/4″ white border around the sheet, and I want my image printed to the edge without having to trim the 1/4″ edge and yielding an odd-sized print. So, instead of printing three 5″x30″ images on a print, I’ll do four 4″x24″ images.
And a finishing touch… when trimming the prints, they get handled a lot; I wear gloves to keep fingerprints off the photo. Latex would probably work, but I use cheap cotton inspection gloves from Grainger.
Oops!
And just to show that things don’t always work smoothly, here’s Photoshop’s attempt at stitching a 6-frame panorama that had been processed through a trial copy of Photomatix first. Although the same HDR settings were used on all the images, there was apparently a lot of difficulty in auto-aligning them – this looks like something from the Star Trek episode where the transporter was malfunctioning.
 I’m a slow adopter of HDR, and this was a trial at doing both HDR and panorama stitching by first processing the images in HDR and then stitching them. PTgui does both at once, but I don’t like the look of its HDR; I have Nik’s HDR Efex Pro 2 as part of the Nik Collection, but at least their presets disagree with my tastes as well. So far, I’m liking the look of a couple Photomatix presets (e.g., Smooth 2), but I clearly have some kinks to work out.
.
Intro | Day 1: Getting Started, Zion | Day 2: Zion
Day 3: Red Canyon, Bryce Canyon | Day 4: Capitol Reef, Canyonlands
Day 5: Dead Horse Point | Day 6: Monument Valley | Day 7: Grand Mesa
Day 8: McClure Pass, Aspen, Garden of the Gods | Day 9: Wolf Creek Pass
Day 10: Durango & Silverton Railroad, Albuquerque Balloon Festival
Day 11: Pre-dawn Balloon Launch, The End | Trip Prep | The Gear
FotoMomenti – My Comrade’s Portfolio
.